
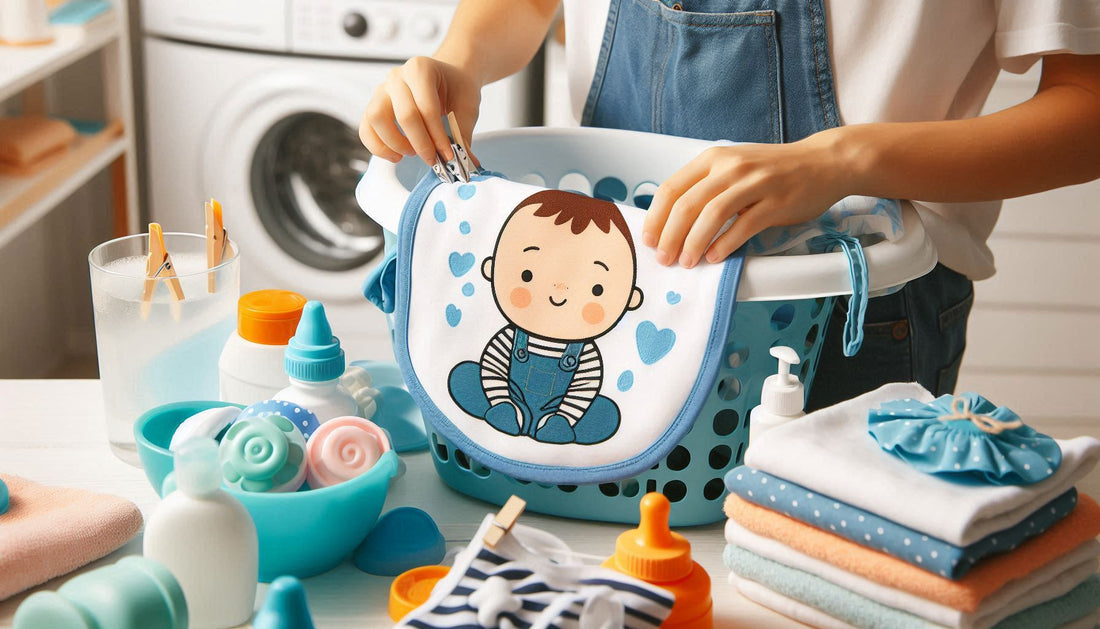
Welcome to the world of motherhood, where every moment is a learning experience and every small task feels monumental, especially in those early months. Among the countless baby essentials you’ll find yourself cleaning, bibs will be one of the most frequent contenders. Whether you’re dealing with drool, food spills, or those unexpected spit-ups, bibs are there to catch it all. But how exactly do you keep these little lifesavers clean and fresh? If you’re a new mom, you might be wondering the best way to wash bibs without wearing them out. This guide is here to walk you through every step.
Understanding the Importance of Clean Bibs
Before diving into the washing process, it's essential to grasp why clean bibs are crucial for your baby's health and comfort. Babies have sensitive skin, and anything that comes into contact with it should be free of irritants. Residual food particles, stains, and even detergents left on bibs can cause rashes or discomfort. Moreover, a dirty bib can harbor bacteria and unpleasant odors, which no one wants near their little one. So, keeping bibs clean isn't just about appearance—it's about keeping your baby safe and comfy.
Step 1: Read the Care Label
Your first step in washing bibs starts with something simple but often overlooked: reading the care label. Most bibs come with specific washing instructions that can make all the difference in preserving their quality. The label will guide you on the recommended water temperature, drying methods, and whether the bib can be machine-washed or should be hand-washed. Ignoring these instructions can lead to faded colors, shrinking, or even damage to the bib's material. So, take a quick glance before you start.
Step 2: Pre-Treat Stains
Bibs are stain magnets, absorbing everything from pureed carrots to drool. The key to keeping them looking new is to tackle stains before they set in. As soon as you remove a bib from your baby, check for any visible stains. You can pre-treat these by applying a gentle stain remover or a small amount of liquid detergent directly to the spot. Gently rub the fabric together to work the solution into the stain, and let it sit for about 10-15 minutes. This step will make it much easier to get rid of stubborn spots during the washing process.
Pro Tip: For tough, set-in stains like baby food or formula, consider soaking the bibs in a mixture of cold water and a bit of baking soda before washing. This natural solution can help lift stains without harsh chemicals.
Step 3: Choose the Right Detergent
Not all detergents are created equal, especially when it comes to baby items. You’ll want to choose a detergent that’s free from harsh chemicals, fragrances, and dyes to avoid irritating your baby’s skin. There are many baby-specific detergents available, but any hypoallergenic, gentle formula will do the trick. Avoid using fabric softeners or bleach, as these can leave residues that may irritate sensitive skin or break down the fabric's fibers over time.
Pro Tip: If you're using a standard detergent, consider running an extra rinse cycle to ensure that all detergent is thoroughly washed out, leaving the bibs soft and safe for your baby.
Step 4: Machine Washing vs. Hand Washing
The decision to machine wash or hand wash your baby’s bibs largely depends on the material of the bib and the level of dirtiness.
Machine Washing: If the care label indicates that the bibs can be machine washed, great! Simply place the bibs in a laundry bag to prevent the ties or Velcro from snagging on other clothes. Use cold or warm water on a gentle cycle to avoid shrinking or damaging the fabric. If you’re washing bibs with Velcro closures, make sure the tabs are fastened to avoid them sticking to other items and creating a tangled mess.
Hand Washing: For more delicate bibs or those made from natural fibers like cotton or bamboo, hand washing might be the better option. Fill a basin with lukewarm water and add a small amount of baby-safe detergent. Gently agitate the water with your hands to create suds, then submerge the bibs. Use your hands to rub the fabric together, focusing on stained areas. Once clean, rinse thoroughly with cold water until all soap is removed.

Pro Tip: After hand washing, avoid wringing the bibs too harshly, as this can stretch or distort their shape. Instead, gently press the water out and lay them flat on a clean towel to air dry.
Step 5: Drying Your Bibs
Drying bibs properly is just as important as washing them. Improper drying can lead to shrinking, warping, or fabric wear.
Air Drying: The safest way to dry bibs is by air drying. Simply hang them up on a clothesline or lay them flat on a clean, dry towel. Air drying helps preserve the shape and fabric integrity of the bibs, especially for those made from natural materials.
Machine Drying: If you’re short on time and the care label allows it, you can tumble dry bibs on a low heat setting. High heat can cause shrinking or damage the waterproof layer of some bibs, so it's best to stick to low or medium heat. Adding a few dryer balls can help keep the bibs soft and prevent them from becoming stiff.
Pro Tip: To keep bibs extra soft, you can toss them in the dryer for a few minutes before air drying. This helps remove excess water and reduces drying time.
Step 6: Storing Clean Bibs
Once your bibs are clean and dry, it's essential to store them properly to maintain their freshness. Ensure they are completely dry before putting them away to prevent mildew or unpleasant odors. Fold the bibs neatly and store them in a dry, cool place, preferably in a drawer or bin dedicated to baby items. This keeps them organized and easily accessible for those quick grab-and-go moments when you’re rushing to feed your hungry little one.
Pro Tip: Keep a few bibs in your diaper bag or near your baby’s high chair so you’re always prepared for meal times, no matter where you are.
Step 7: Dealing with Stubborn Odors
Sometimes, even after washing, bibs can retain stubborn odors, especially if they’ve been through a particularly messy meal. To combat this, try soaking the bibs in a mixture of water and white vinegar before washing. Vinegar is a natural deodorizer that can help neutralize unpleasant smells without harsh chemicals. After soaking for about 30 minutes, wash as usual, and your bibs should come out smelling fresh and clean.
Pro Tip: If the smell persists, try adding a few drops of essential oils, like lavender or tea tree oil, to the rinse cycle. Not only will this leave a pleasant scent, but some essential oils also have natural antibacterial properties.
Step 8: Tips for Special Materials
Bibs come in various materials, each requiring slightly different care. Here's how to handle some of the most common types:
- Silicone Bibs: These are incredibly easy to clean. Simply rinse them off in the sink with warm soapy water, or toss them in the top rack of the dishwasher. Silicone is naturally resistant to stains and odors, making these bibs a low-maintenance option.
- Waterproof Bibs: Often made with a waterproof layer, these bibs can usually be machine washed, but you should avoid high heat when drying. Air drying is the best way to keep the waterproof layer intact.
- Organic Cotton Bibs: These require a bit more care. Wash them on a gentle cycle with cold water and air dry to prevent shrinking and maintain their softness.
- Bamboo Bibs: Bamboo is naturally antibacterial and incredibly soft, but it can shrink if washed in hot water. Stick to cold water and air drying to keep these bibs in top shape.
Common Mistakes to Avoid
Even with the best intentions, it’s easy to make mistakes when washing baby bibs. Here are a few common pitfalls and how to avoid them:
- Using Bleach: While it might seem like a good idea to use bleach to get rid of tough stains, it can be too harsh on bibs, especially those made of natural fibers. Bleach can weaken the fabric and cause discoloration.
- Overloading the Washer: Throwing too many bibs in the washer at once can prevent them from getting thoroughly clean. Give them some space to move around so the water and detergent can do their job effectively.
- Skipping the Pre-Treat: Ignoring stains until laundry day might make them harder to remove. Taking a few minutes to pre-treat stains as soon as they happen can save you time and effort later.
- Not Securing Velcro: If your bibs have Velcro closures, always fasten them before washing. This prevents the Velcro from sticking to other items and causing snags or damage.
The Final Step: Enjoy the Journey
Caring for your baby's bibs may seem like a small task, but it's part of the larger journey of motherhood. Every time you clean those little pieces of fabric, you’re doing more than just laundry—you’re providing comfort and care for your baby. So take pride in the process, knowing that these small acts of love add up to a happy, healthy, and well-cared-for little one.
A Helping Hand with Happy Matty Store
As a new mom, finding the right products that make your life easier is key. That's where Happy Matty Store comes in. Whether you’re looking for high-quality bibs, baby-safe detergents, or other essentials, Happy Matty Store has you covered. Their range of products is designed with moms in mind, ensuring that every item is practical, safe, and made to last. Visit their store today and discover how they can help you make motherhood a little bit simpler, one product at a time.